In summer 2014 I made my way out to the Science Museum in London to check out my WALLY – Wallplate Generator on display. It was pretty awesome. While I was there I stopped in Oxford for a day and captured some “scanvenirs“. One of them turned out particularly well.
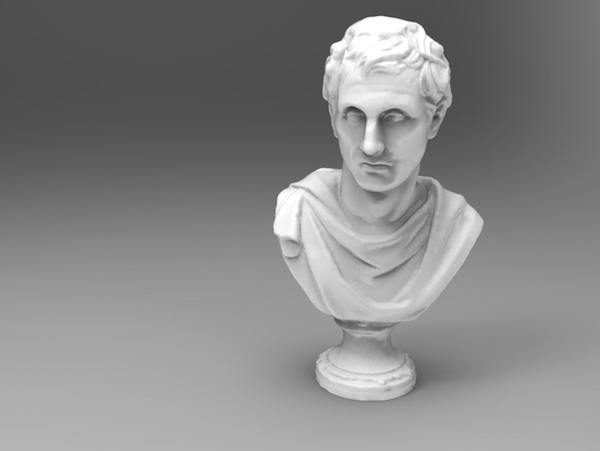
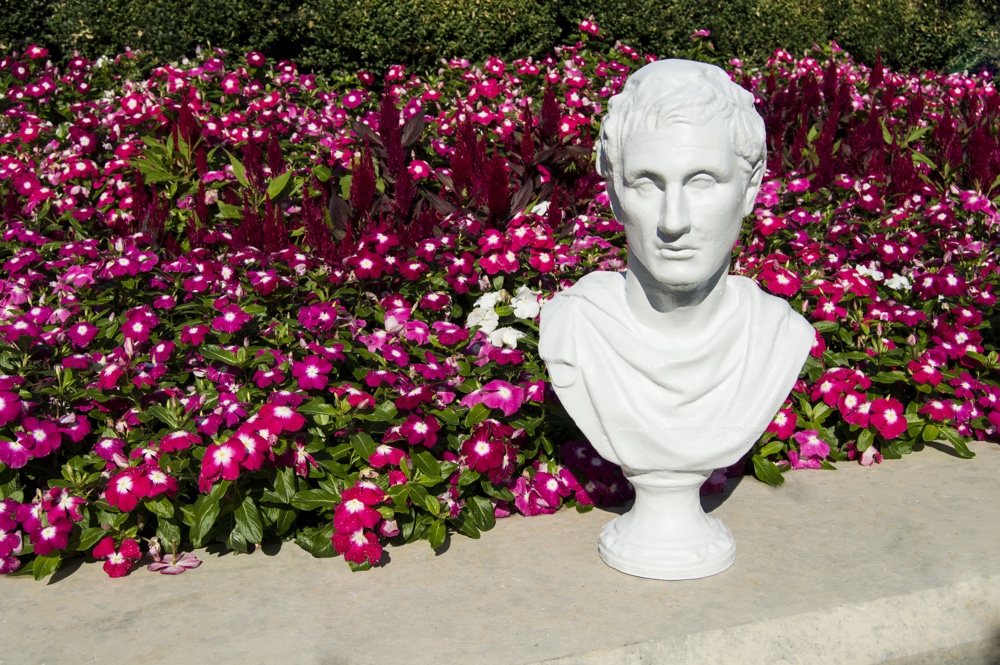
My scan of the Marble portrait of the Greek playwright Menander (342-291 BC) is available for download on Thingiverse and was generated by running 45 images I took on my iPhone 5S through 123D Catch. Considering I only took 2 minutes to take all the photos (according to the photos Exif data) in a crowded museum, I’m very happy with how it turned out. When I got back to the states I processed the scan in Meshmixer and printed a few copies of the model at pretty small scale. I also used the model for the base of a couple other remixes, and because the scan and prints turned out so well I just keep going back to it, trying to figure out new ways to use it.
I’ve been following Cosmo Wenman’s amazing work with 3D scanning for a couple of years now. One of the things that really stood out to me was his life size recreations of sculptures.
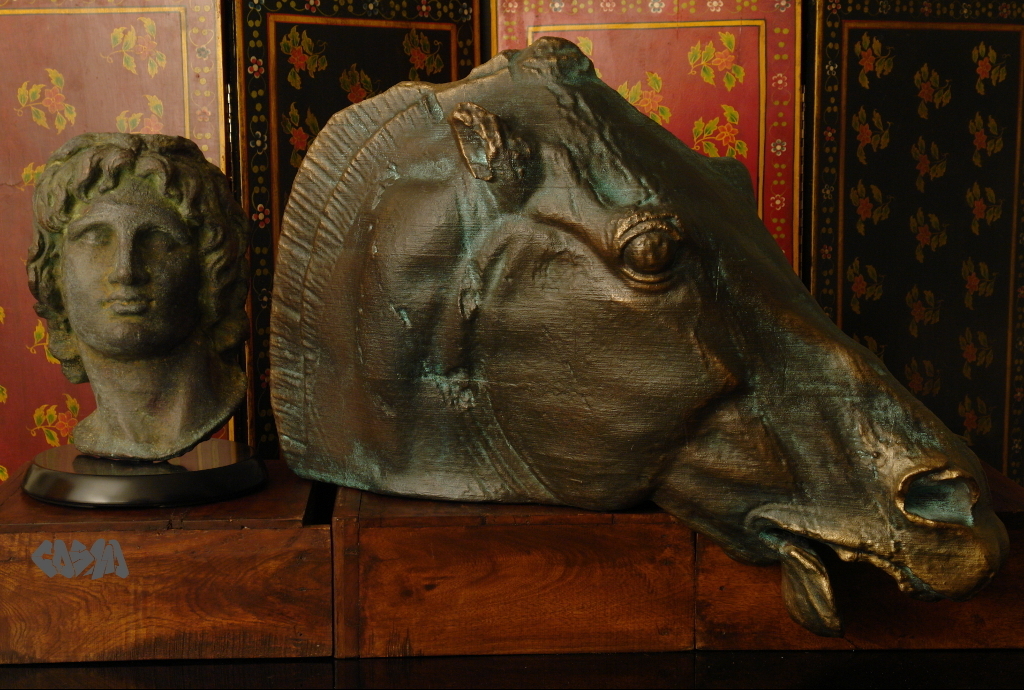
Head of a horse of Selene. Photo courtesy of Cosmo Wenman
Between printing at full-size and the finishing work/paint jobs he does they end up looking incredibly close to the real thing. Now don’t get me wrong, I love my miniature prints but there is something really striking about seeing a sculpture at the original scale it was meant to be viewed. Because my scan of Menander turned out so nice I thought this would be a perfect opportunity to try printing something life-sized myself.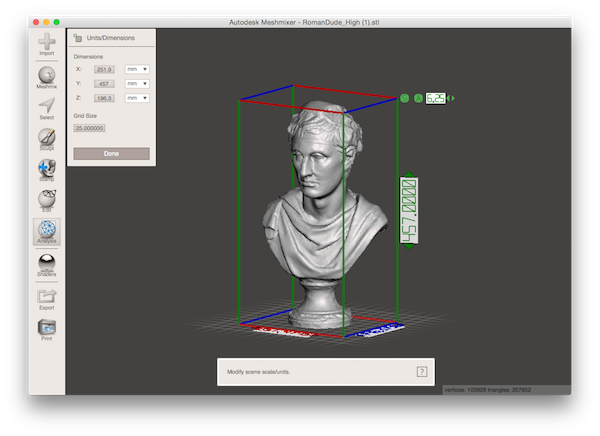
The first step was the scale the STL file to the appropriate height in Meshmixer. I did this using the the Units/Dimensions tool under the Analysis menu. I scaled this to 18 inches (457mm) tall which is around life-size.
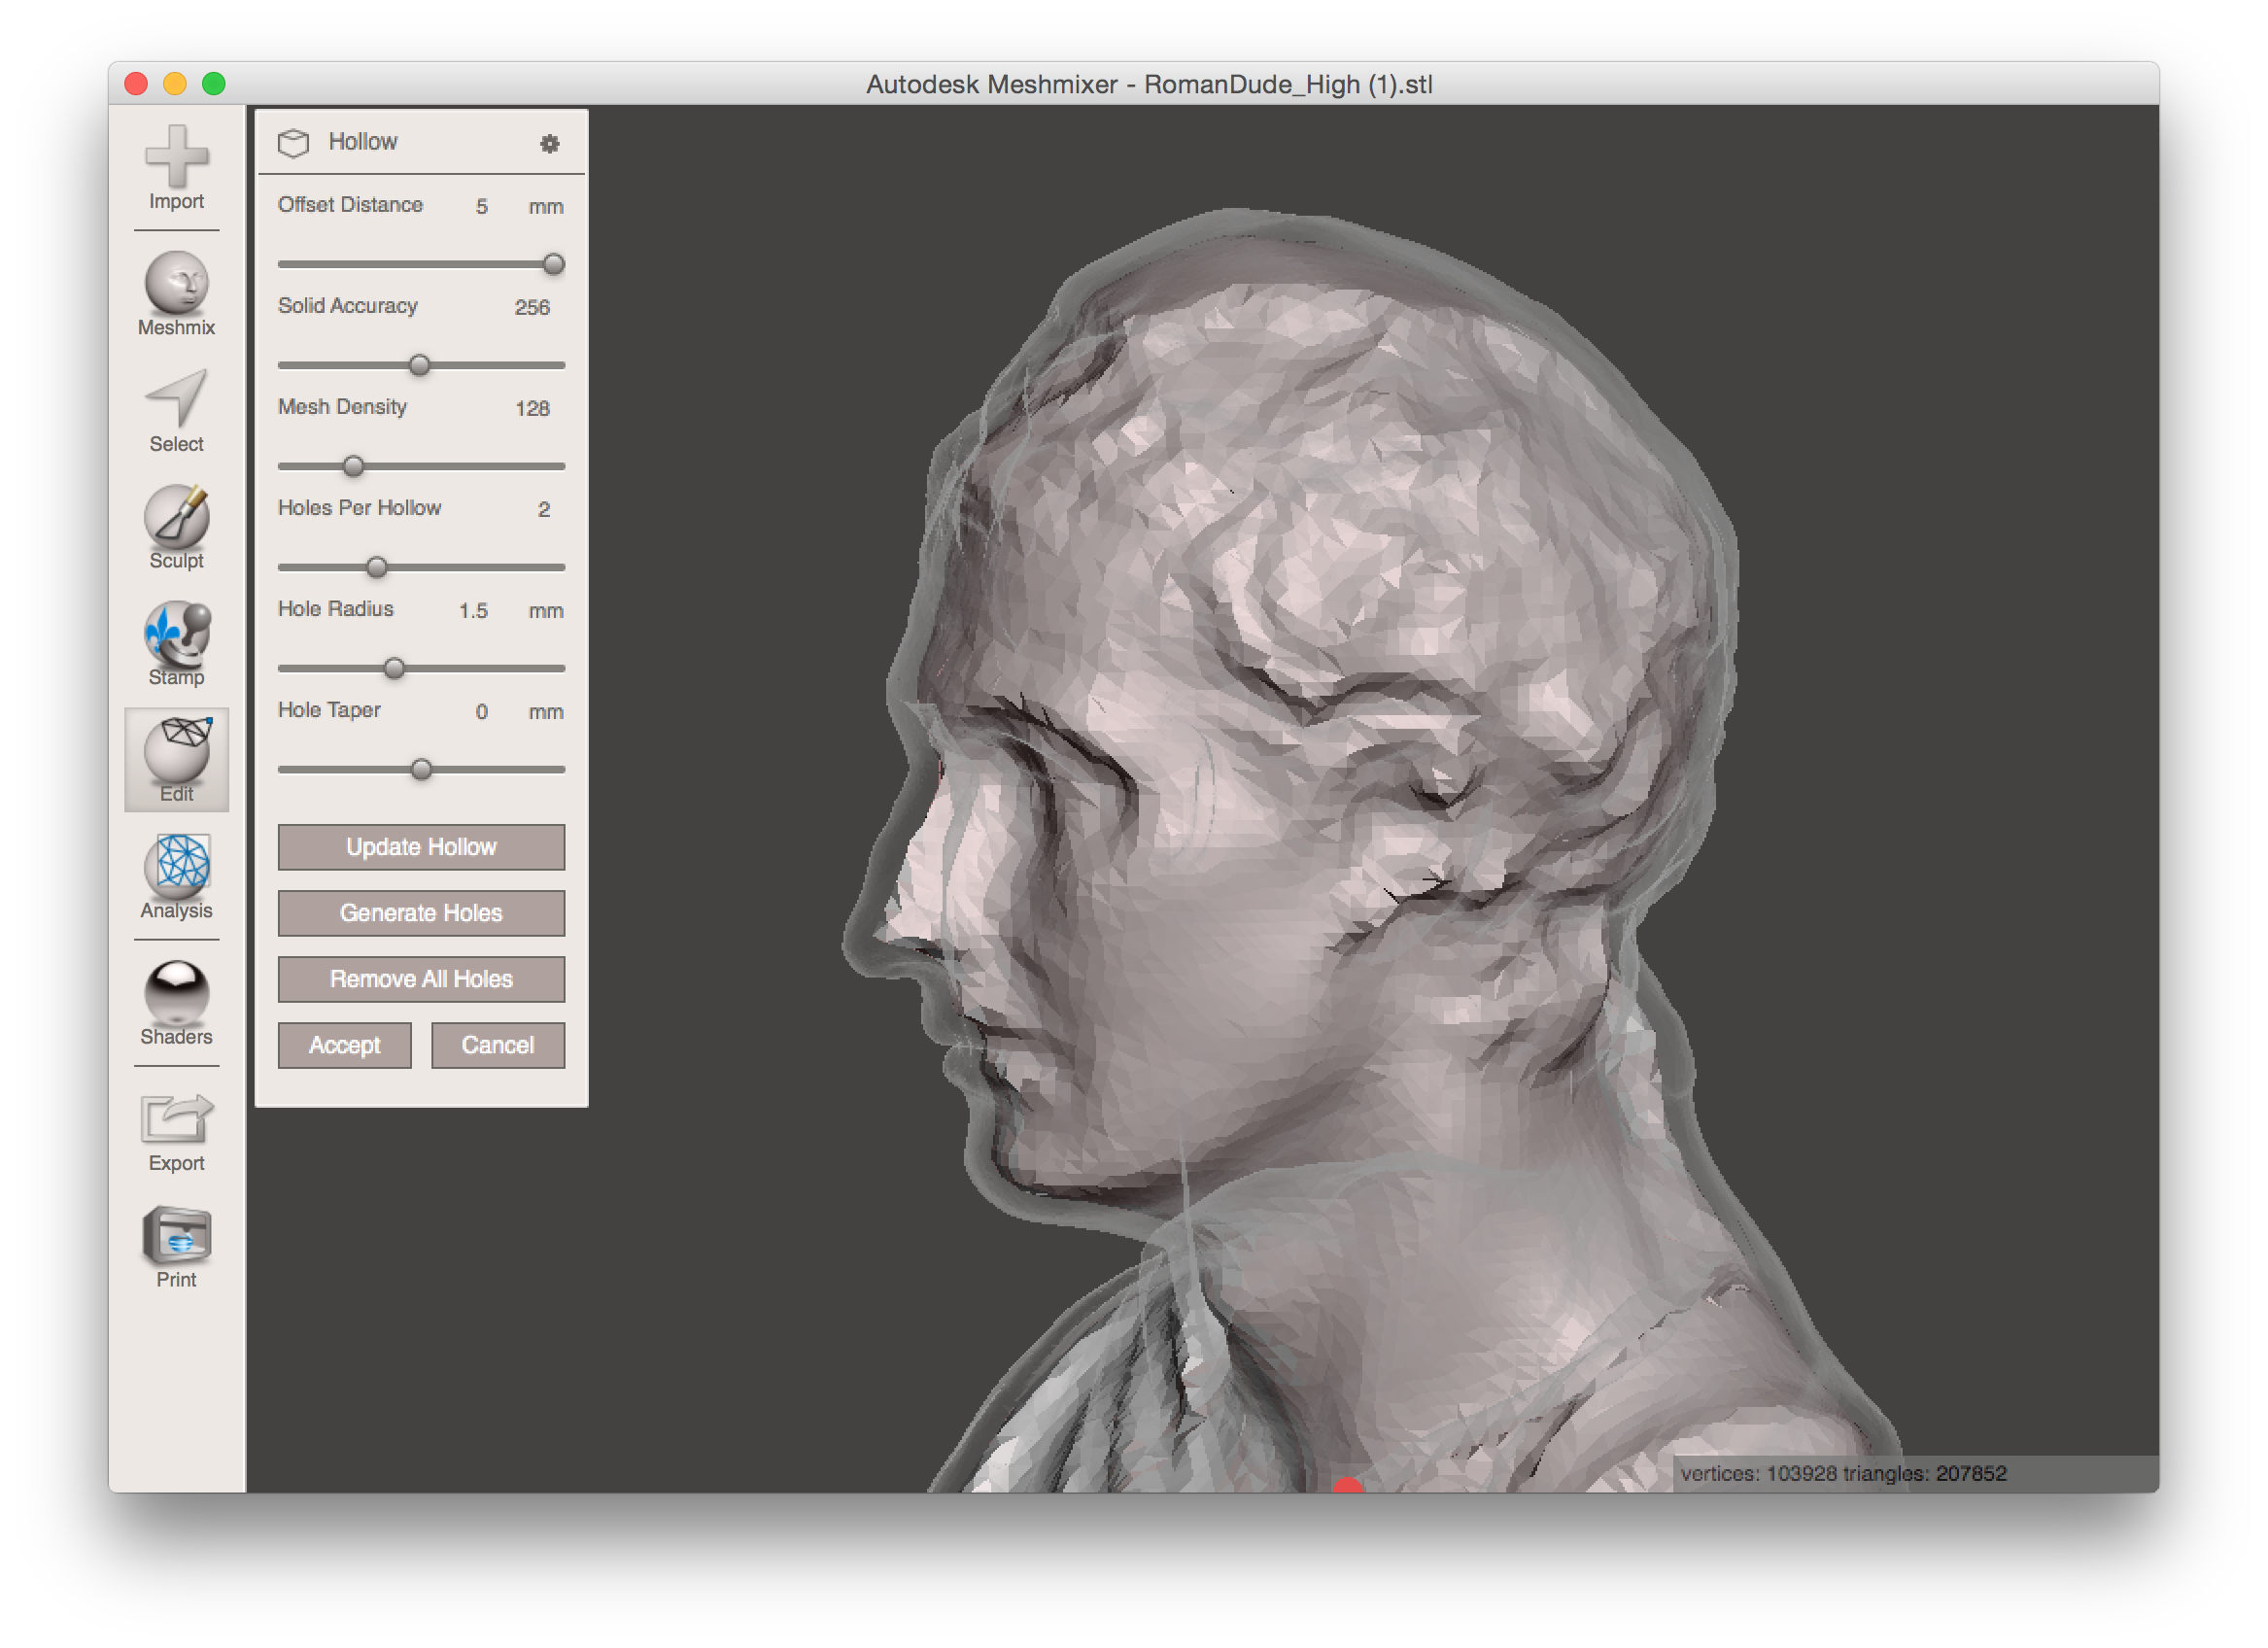
The next step was to hollow out the model. I’m not sure if this is necessary (or even a good idea), the only large scale print project I’ve been involved with (WeTheBuilders) used solid blocks through out the model. But I thought using a thinner walled print might help with alignment and filling any gaps that formed form curling or shrinking during printing. I hollowed out the model to 5mm which I thought would be a good mix between strength and print bed adhesion.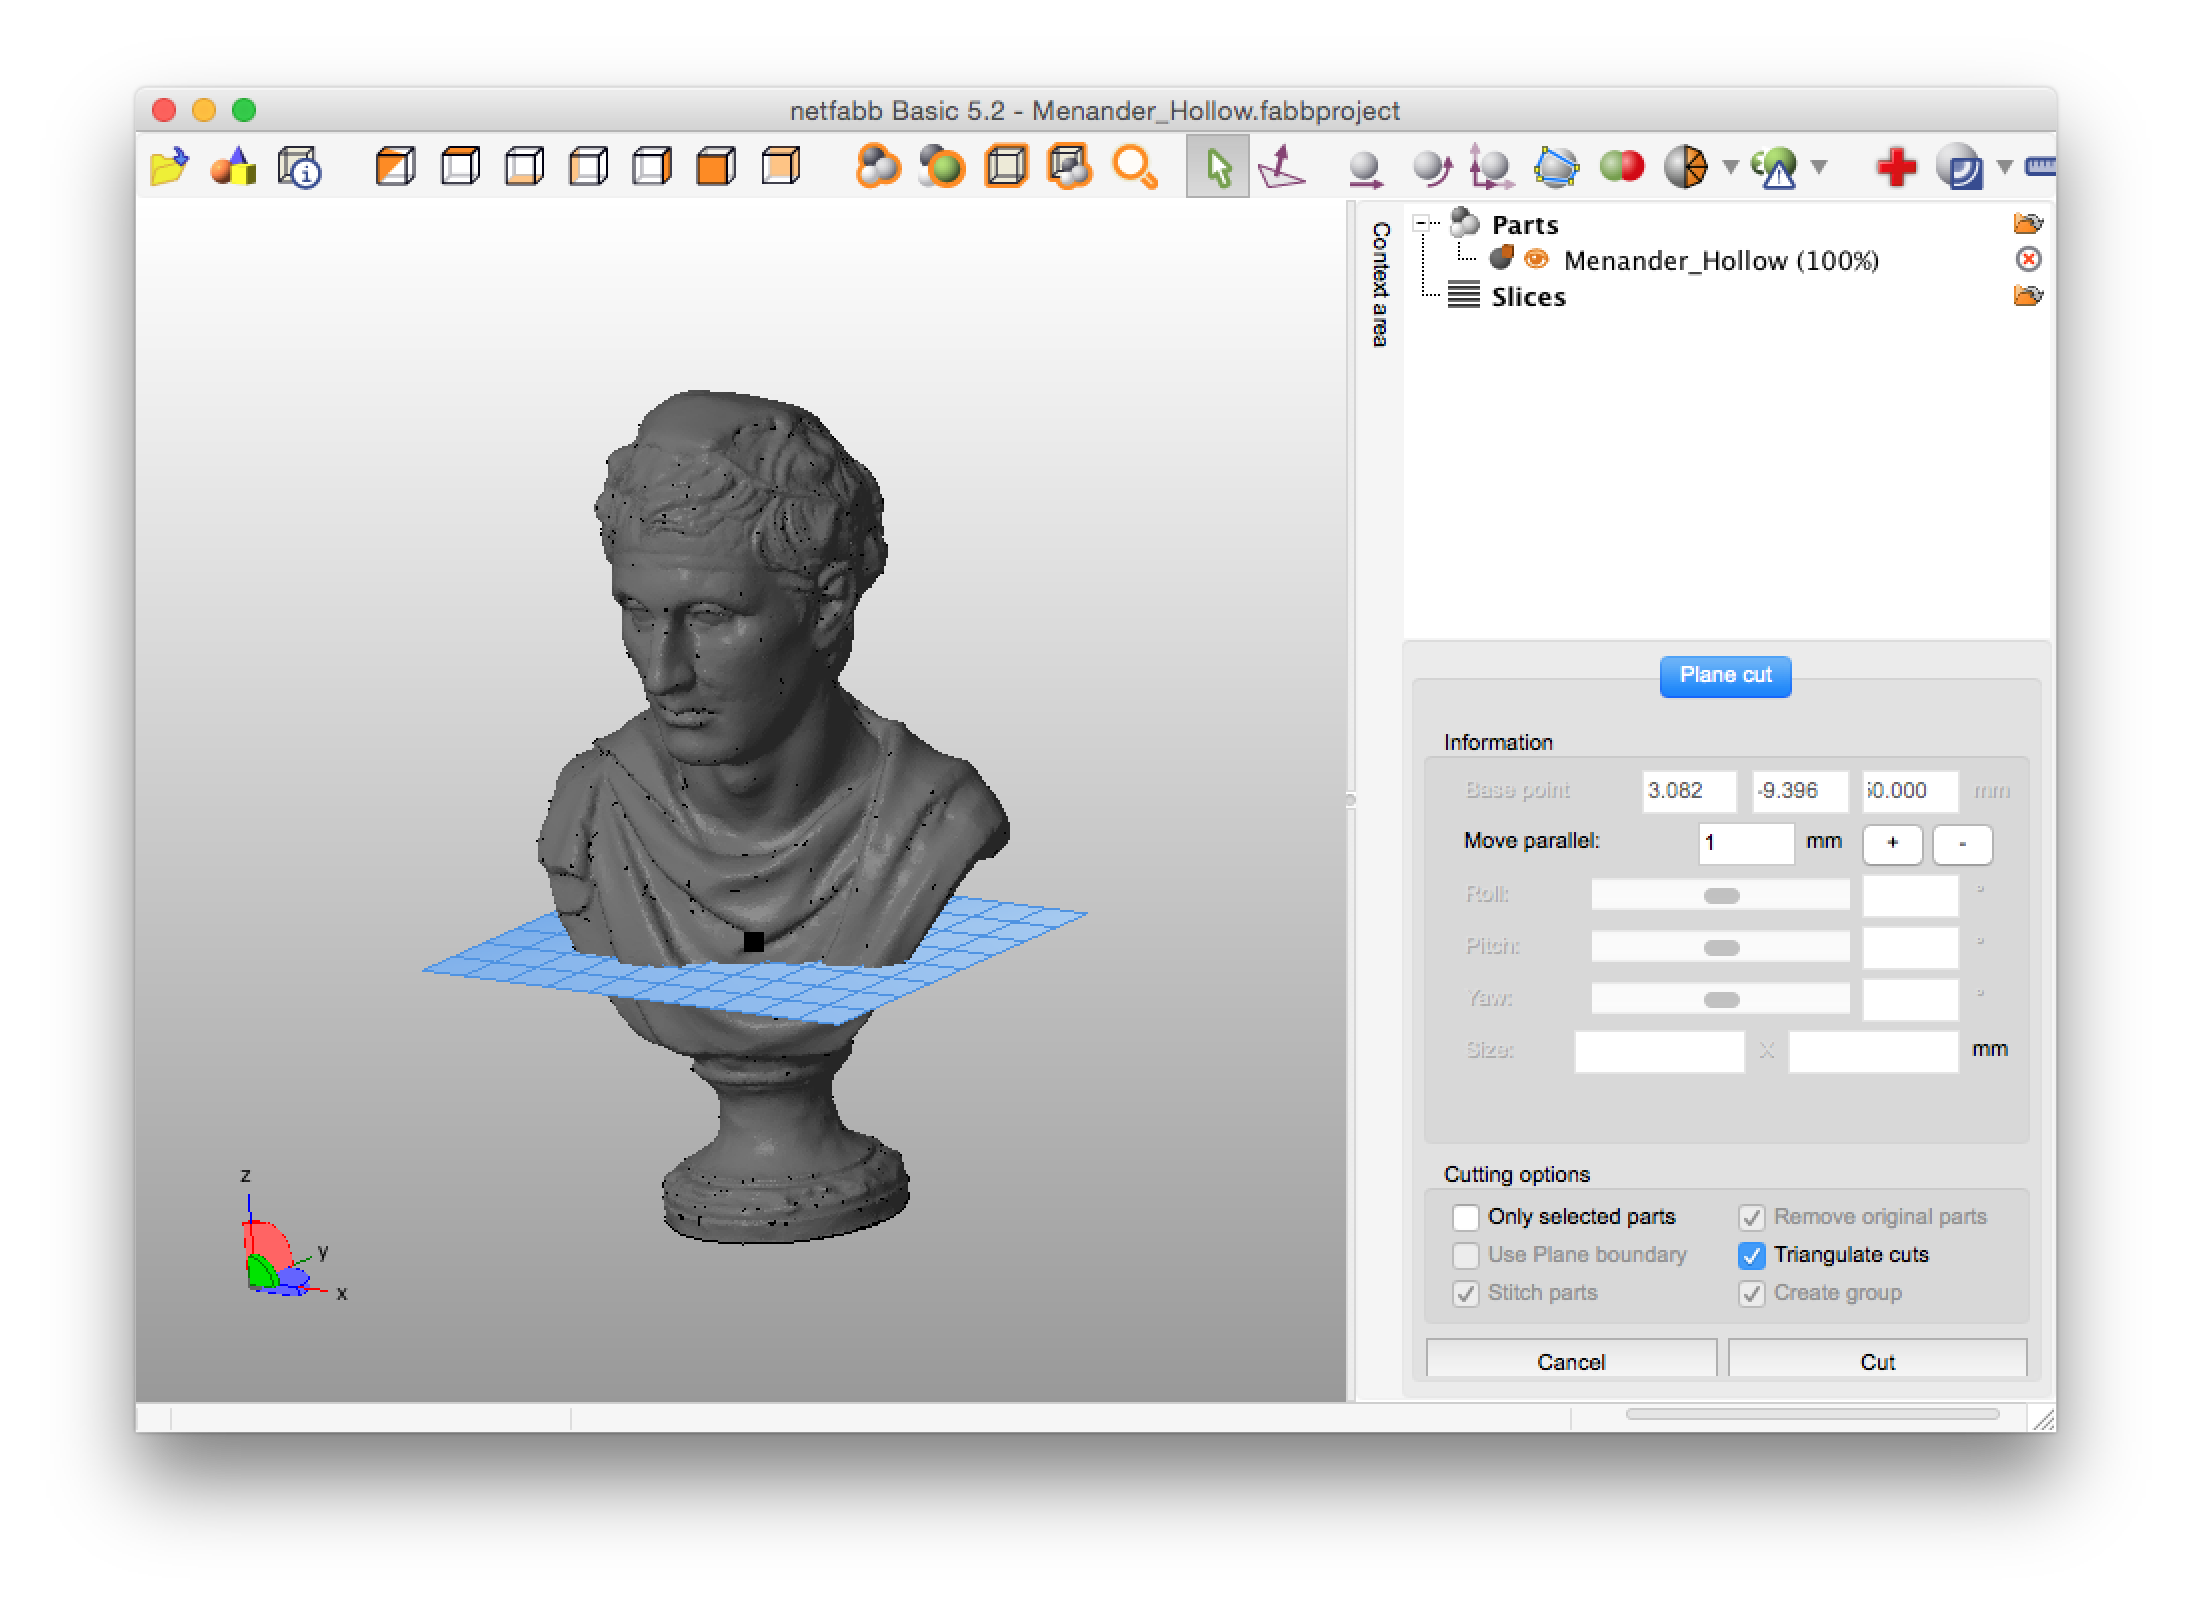
Then the cutting process began… My printer, the Makerbot Replicator 2 has a build volume of 285mm x 153mm x 155mm. I used Netfabb Basic to slice my model into “chunks” that fit these dimensions. I made my slices 150mm tall (5mm under my max build volume), I thought I could just cube up my model to fit my printers build volume, but this wasn’t as cut as dry as I had originally thought.
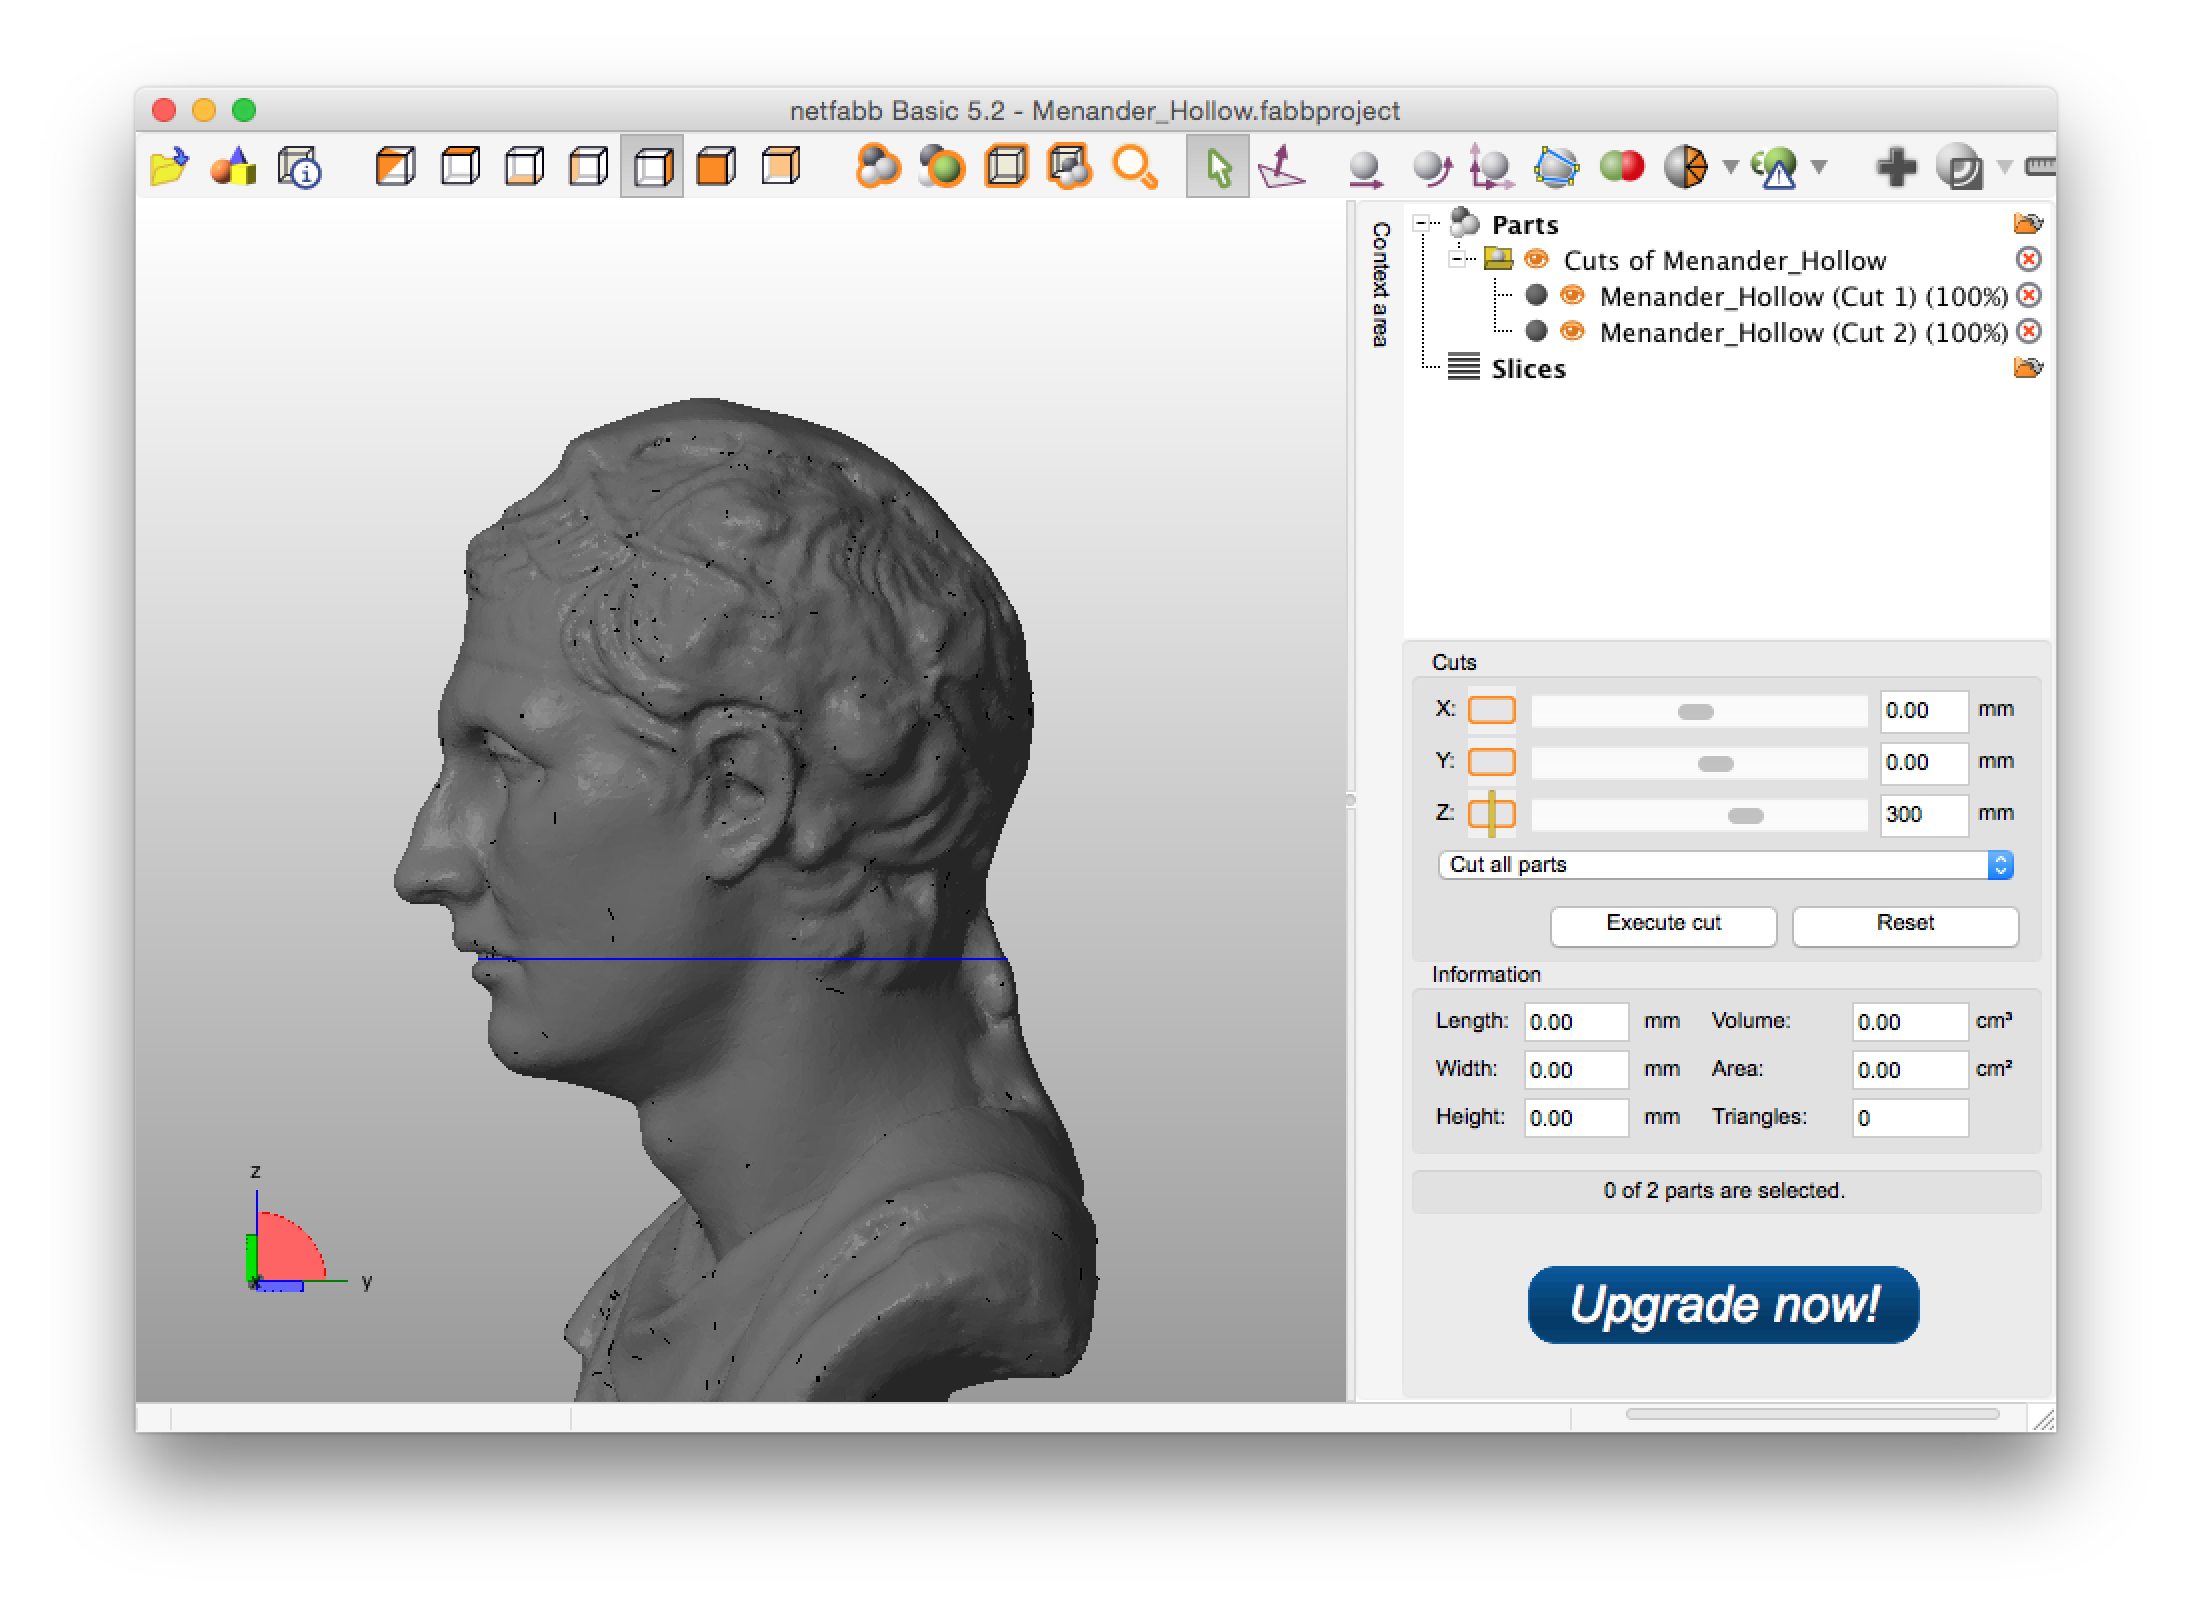
As it turns out, simply slicing the model into cube-ish peices that fit your printer isn’t really the best option. As you can see from the picture above if I had continued to slice the model into 150mm slices tall I would have cut right through the middle of the face. I feel like having a smooth seamless face is pretty important for this print, and while I know things like that can be hidden during my finishing process I’m not quite good at it to do a very good job hiding the seam.
I ended up slicing some parts slightly smaller or larger to help hide seams. The animation above shows a pretty good break down of how that worked out. So there are definitely some artistic considerations when slicing up a large model for print.
After slicing all my parts I gave them a quick look over. A couple of the parts had some pretty severe overhangs, but I was able to avoid using support material by rotating the parts so the overhangs would print build-plate side down.
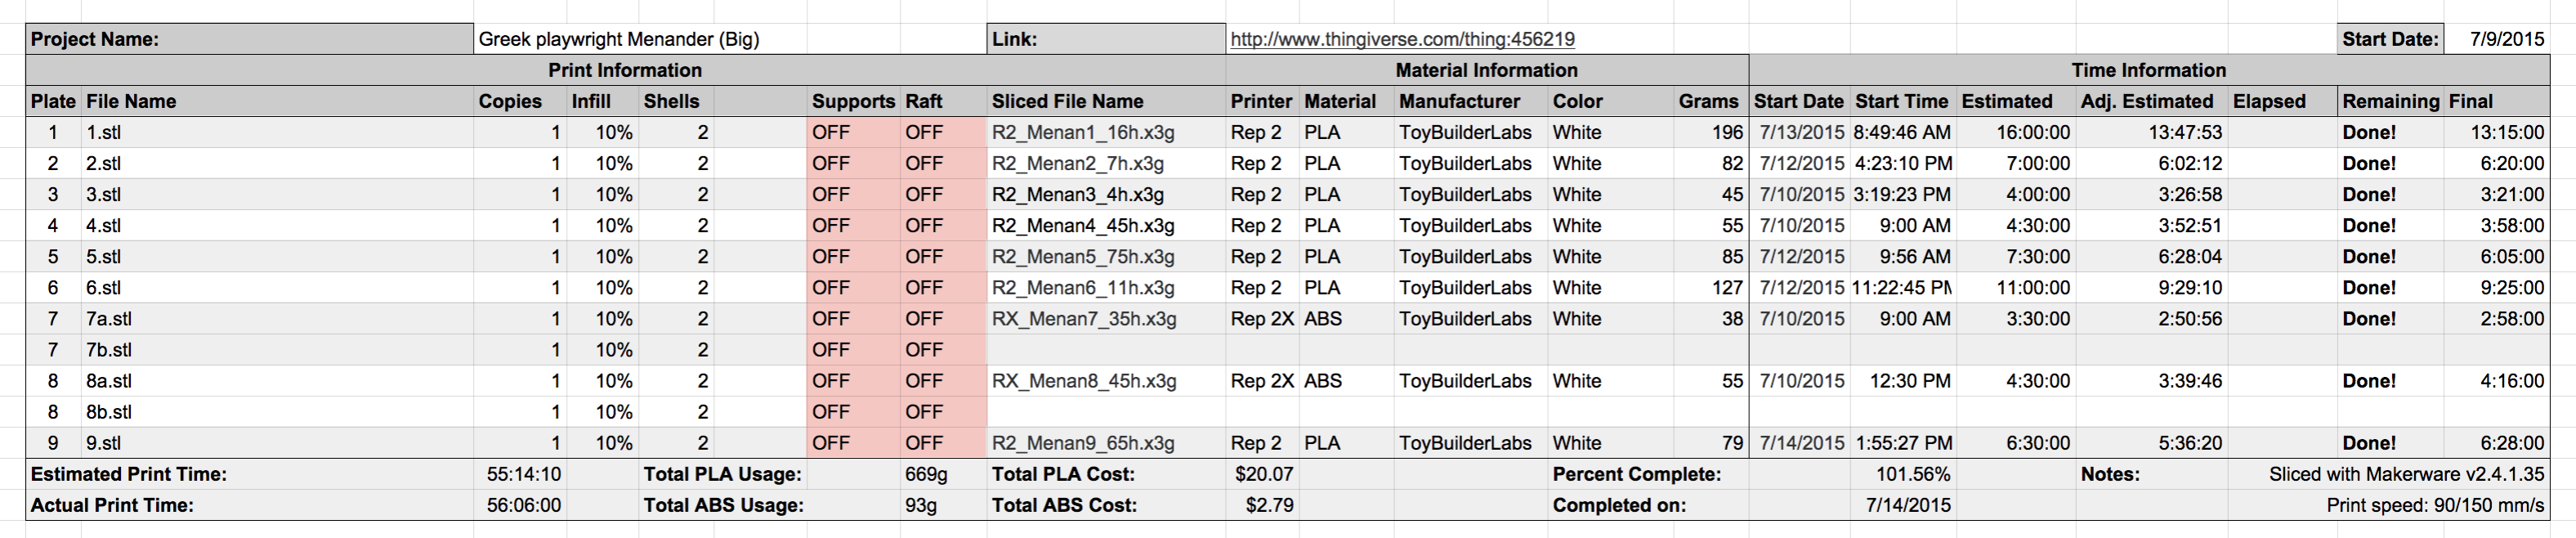
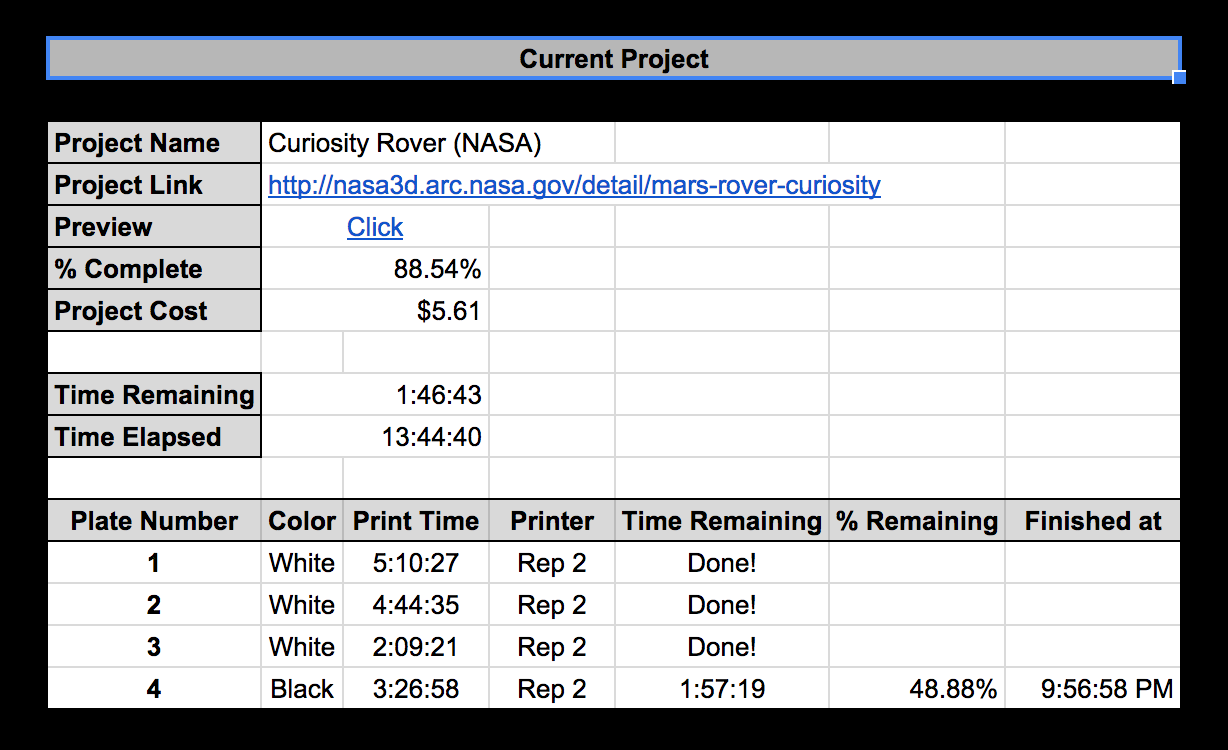
When everything was said and done this project had 9 huge prints. With the shortest print coming in at 3.5 hours, and the longest at 16 hours I thought it might make sense to find a way to track my prints. I put together a Google Sheets document to track all my prints and printer settings. I’ve since continued to improve upon it to give me better print time estimates and even a real-time print timer/dashboard.
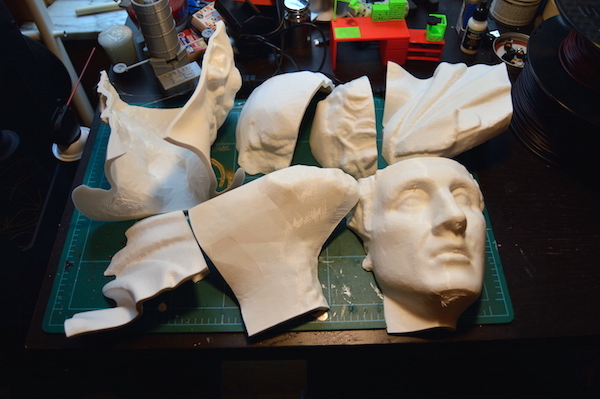
After 56(!) total hours of printing I had myself a nice pile of parts. Assembly was the next step and involved some processes I wasn’t super familiar with before starting. I started by gluing all my parts together using Loctite “Gel Control” Super Glue. This worked pretty well, but I ended up reinforcing all my internal seams with some heavy duty superglue from McMaster Carr (Part #7518A61). I’ve used this hot glue in the part on my Proton Pack build and it’s held strong for years so far.
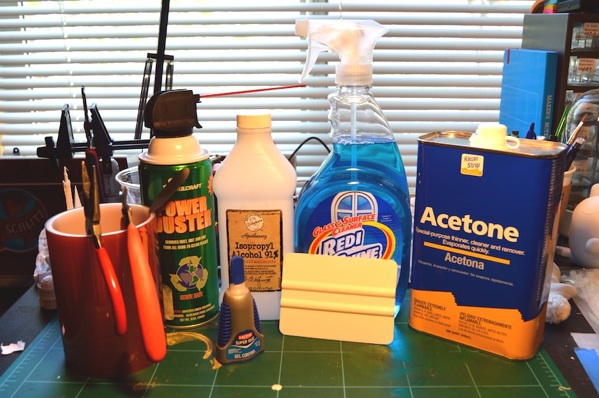
While I had pretty good luck with my print bed adhesion and used PLA to reduce shrinkage during my prints there were still some gaps after gluing. I used Apoxie Sculpt (a two part epoxy putty), to seal all my cracks. The putty is pretty easy to work with, you mix the two clay-like parts (wear gloves!) until it’s a solid color. Then use it like clay to fill the holes in your model. I found that using small clay/sculpting tools helped avoid large globs that would need to be sanded down later. Wetting your fingers also helps smooth the epoxy after applying it. The epoxy has a working time of a couple of hours, but after waiting overnight it cures into a very hard plastic that can be sanded smooth.
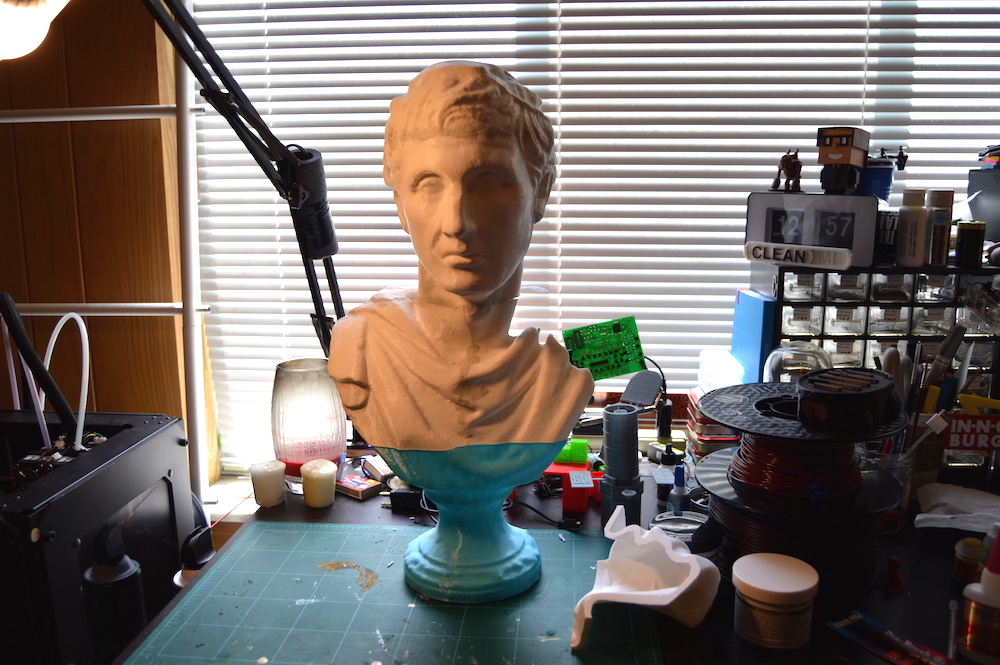
After letting the epoxy cure overnight I sanded the seams smooth. I’ll admit looking back I should have spend more time on this step, but I was pretty anxious to get panting. Before moving on to paint I gave the whole print a coat of filler primer. This made the surface of the print look even nice and hid some of the prints imperfections.
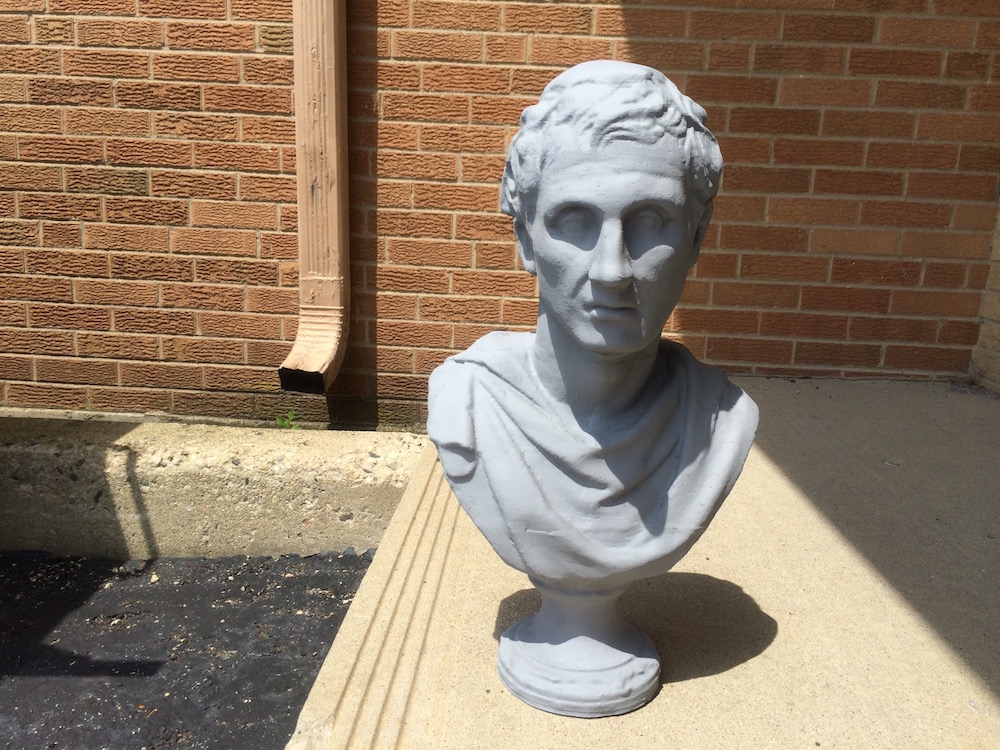
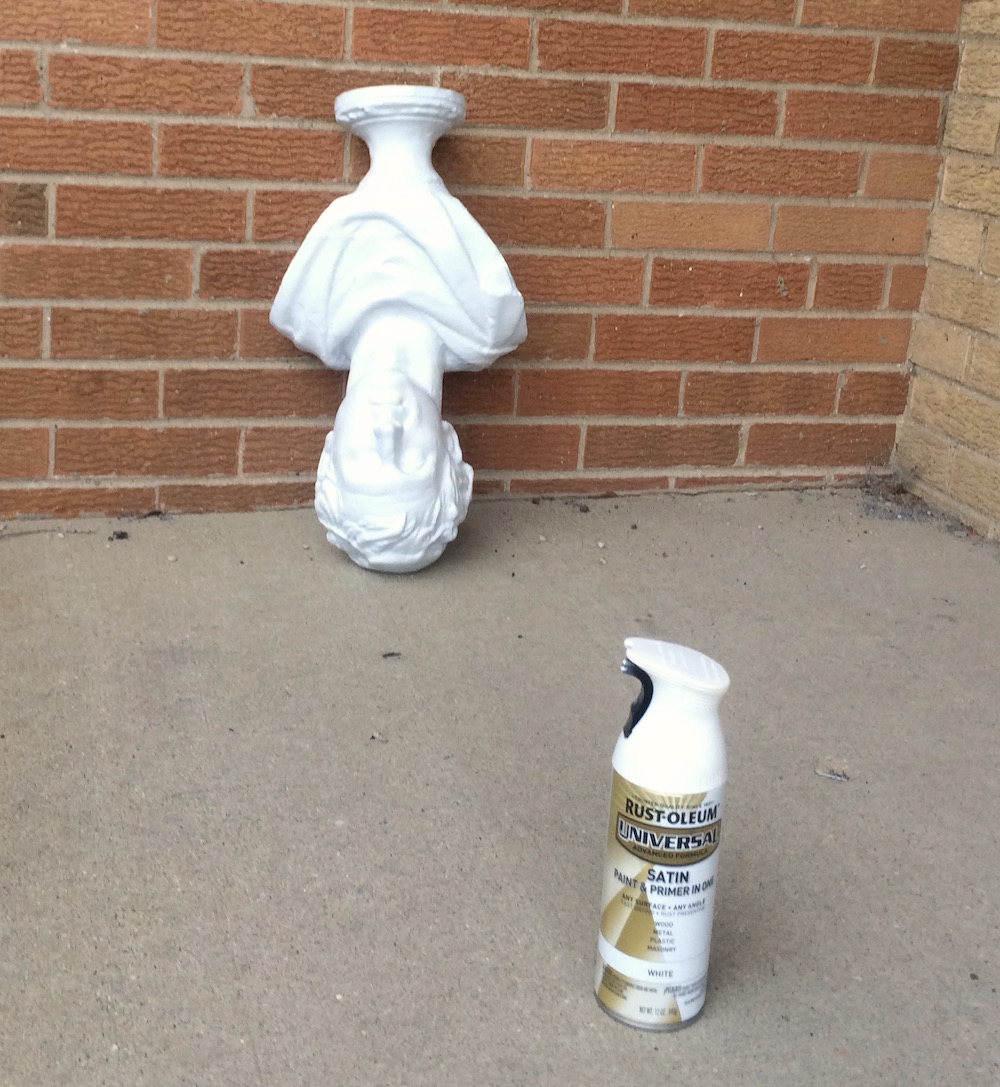
Then came the exciting part, the final coat of paint. I used Rustolium Ultimate White Satin spray paint. I’ve used this in the past for painting prints and it seems to adhere pretty well to plastics, I figured with a primer coat it would work perfectly. I really didn’t have any issue with the paint and I like the slight sheen the satin paint gave to the print.
While I may not print everything I make at a true to life scale, this was a really fun project. It’s really interesting to see what details hold up to the scale.

